Lithophanes
The word lithophane comes from the Greek words litho, meaning “stone,” and phainein, meaning “to produce to appear.”
The first lithophanes were manufactured out of porcelain cast in wax moulds in the 1800s.
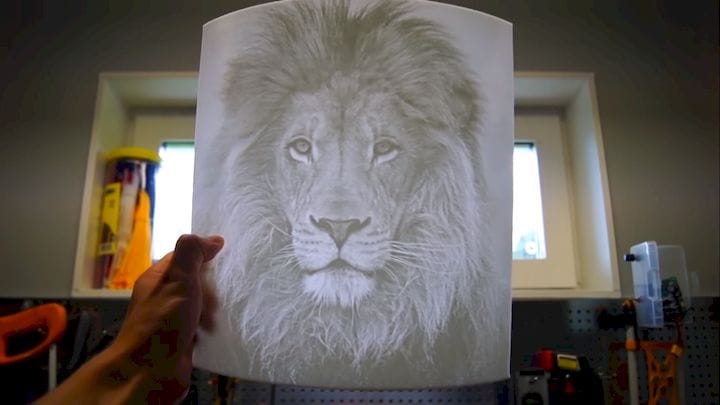
A lithophane is a translucent object on which an image is projected by adjusting the thickness of the material. It has been in use for hundreds of years, but 3D printing has only recently made it easier to make.
Components:
- Lithophane
- Light source
Working Principle:
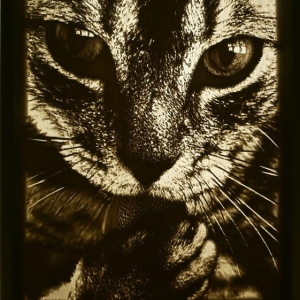
The light that passes through a lithophane is modulated. In simple terms, it makes a height map of the image, with the darker portions of the image having a thicker cross-section, allowing less light to flow through, and the lighter areas of the image having a narrower cross-section, allowing more light to pass through. It produces a black-and-white image that is lighted by a backlight.
When you shine a light on the reverse of the lithophane, the image appears as a contrast of various light intensities.
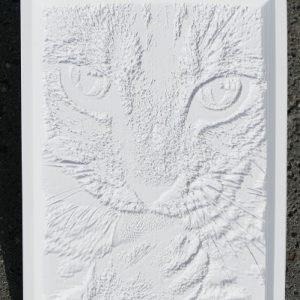
A lithophane can be manufactured with exceptional precision and consistency using 3D printing.
To make a personalised lithophane, start by choosing a high-resolution image with high contrast features. You can build an STL file with the lithophane using free internet tools, which you can then import into the slicer of your choice. In order to effectively print lithophane, it is critical to set the infill percentage to 100% before beginning the print.
White polylactic acid (PLA) stands out as the best filament choice for this type of print due to the nature of lithophanes. However, because PLA has a low glass transition temperature (about 60°C), it is advised that the lithophane be illuminated with an LED. They use less energy and squander less energy in the form of heat.
If this isn’t possible, you can print the lithophane with PETG, which is more heat resistant but also more difficult to print.
We may use a 3D printer to produce thickness changes on a surface by adding layers on the Z-Axis or increasing the number or thickness of lines in our design. The image could then be seen as a conventional photograph with backlighting or a lamp.
PLA is an environmentally friendly substance, making it an excellent choice for printing lithophanes. It seems translucent when the thinnest pieces are produced, and it turns darker as the thickness increases. When a white PLA is used, the effect becomes even more infamous.
Although any light hue can be used, white is the greatest choice because it produces the best results even with low-power lamps.
Because dark colours do not allow light to travel through the lithophane, they are not suitable for this use.
Instructions:
- Place the lithophane in front of a light source
- Watch the image reveal itself
Links:
How To 3D Print Lithophanes « Fabbaloo
How to 3D Print Your Own Lithophane
3D Printing the Perfect Lithophane Picture
3D Printing Your Photos – Lithophanes
Perfectly 3D Print All Types of Lithophanes and then Add Colour
Bringing Photos To Life with 3D Printed Lithophanes
Lithophanes: 3D Printing Your Photos!
What Are Lithophanes? This is How to Turn Your Photos into 3D Art
Lithophanes: how to make one and what filament to use
What Is a Lithophane and How Can You 3D Print One?
What is a lithophane? And more about 3D printed lithophanes • ItsLitho
Slicer Settings for Lithophanes | Tweaking to Perfection • ItsLitho